


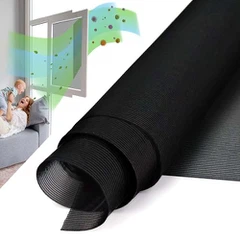
Hey there! As a supplier of Plisse insect screens, I often get asked if the installation instructions for these screens are easy to follow. Well, let me tell you, I've seen it all, and I'm here to share my thoughts on this topic.
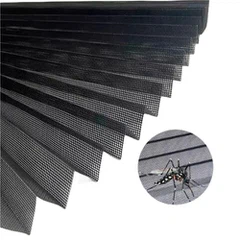
First off, what are Plisse insect screens? They're a great solution for keeping those pesky bugs out while still allowing fresh air to flow into your home. They come in various types, like the Folding Screen Mesh, Mosquito Pleated Mesh, and Plisse Fly Screen. These screens are designed to be flexible, easy to use, and can be installed on windows, doors, or even patio areas.
Now, let's talk about the installation process. I'd say, for the most part, the installation instructions for Plisse insect screens are pretty straightforward. Most of the time, you'll get a detailed set of instructions that come with the screen. These instructions usually include step - by - step guides, diagrams, and sometimes even video tutorials if you're lucky.
The first step typically involves measuring the area where you want to install the screen. This is super important because getting the measurements wrong can lead to a screen that doesn't fit properly. You'll need to measure the width and height of the window or door opening accurately. Make sure to measure at multiple points to account for any irregularities in the frame.
Once you've got your measurements, the next step is to prepare the mounting surface. This might mean cleaning the frame to remove any dirt, dust, or debris. A clean surface ensures that the adhesive or mounting hardware sticks properly.
After that, it's time to start installing the screen. If it's an adhesive - based installation, you'll carefully peel off the backing of the adhesive strip and press the screen firmly onto the frame. It's important to smooth out any air bubbles as you go to ensure a good seal. Some Plisse insect screens come with a track system. In this case, you'll need to install the tracks first and then slide the screen into place.
One of the great things about these installation processes is that they don't usually require any special tools. For most installations, you'll only need a tape measure, a utility knife (to trim the screen if necessary), and maybe a screwdriver if the mounting hardware involves screws. This means that even if you're not a DIY expert, you can still handle the installation on your own.
However, there are a few potential challenges that you might face. For example, if you have an older window or door frame that's not perfectly square, it can be a bit tricky to get the screen to fit just right. In some cases, you might need to make some minor adjustments, like trimming the screen slightly or bending the tracks a little bit. But don't worry, these are usually minor issues that can be resolved with a bit of patience.
Another thing to keep in mind is that different types of Plisse insect screens might have slightly different installation methods. For instance, the Folding Screen Mesh might have a different installation process compared to the Mosquito Pleated Mesh. But overall, the basic principles remain the same.
If you're still not confident about installing the screen yourself, many suppliers, including us, offer installation services. We've got a team of experienced installers who can come to your place and get the job done quickly and efficiently.
In conclusion, while there might be a few bumps in the road, the installation instructions for Plisse insect screens are generally easy to follow. With a bit of time, patience, and attention to detail, you can have a bug - free home in no time.
If you're interested in purchasing Plisse insect screens for your home or business, we'd love to hear from you. Whether you have questions about the product, the installation process, or just want to get a quote, don't hesitate to reach out. We're here to help you make the best choice for your needs.
References


- Industry knowledge and experience as a Plisse insect screen supplier.
- Customer feedback and installation reports over the years.